Laravel 5.7 — Databases and Migrations

Frontend Web Developer working with WordPress, Umbraco, Laravel & Shopify
Database Configuration in Laravel
In order to connect a database, we will concentrate on the .env file. This is where you will find the configuration settings to set the database host, username and password along with a host of configurations. You may never end up using all of them. Below is an example of the .env file that is generated when you create a new Laravel project.
APP\_NAME=Laravel

APP\_ENV=local

APP\_KEY=base64:7b6e1+2Ok25kR2g54fVFeEWfXciimtt5eAvBSK7RpWc=

APP\_DEBUG=true

APP\_URL=http://localhost

LOG\_CHANNEL=stack

DB\_CONNECTION=mysql

DB\_HOST=127.0.0.1

DB\_PORT=3306

DB\_DATABASE=homestead

DB\_USERNAME=homestead

DB\_PASSWORD=secret

BROADCAST\_DRIVER=log

CACHE\_DRIVER=file

QUEUE\_CONNECTION=sync

SESSION\_DRIVER=file

SESSION\_LIFETIME=120

REDIS\_HOST=127.0.0.1

REDIS\_PASSWORD=null

REDIS\_PORT=6379

MAIL\_DRIVER=smtp

MAIL\_HOST=smtp.mailtrap.io

MAIL\_PORT=2525

MAIL\_USERNAME=null

MAIL\_PASSWORD=null

MAIL\_ENCRYPTION=null

PUSHER\_APP\_ID=

PUSHER\_APP\_KEY=

PUSHER\_APP\_SECRET=

PUSHER\_APP\_CLUSTER=mt1

MIX\_PUSHER\_APP\_KEY=”${PUSHER\_APP\_KEY}”

MIX\_PUSHER\_APP\_CLUSTER=”${PUSHER\_APP\_CLUSTER}”
The only part of the .env file we need to focus on is the MySQL configuration. We need to create the database using PHPMyAdmin or SQL Workbench. Then enter populate the following fields.
DB\_CONNECTION=mysql
DB\_HOST=127.0.0.1
DB\_PORT=3306
DB\_DATABASE=database-name-here
DB\_USERNAME=username-here
DB\_PASSWORD=your-password-here
There’s also a database.php file that can be found inside the config folder. This file shows you the different database connections you can make. For now, we will use the default MySQL connection. That is good enough. You can see the file here on the official Laravel Github repository: https://github.com/laravel/laravel/blob/master/config/database.php
Database Migrations
In order to create a migration in Laravel we use the following command;
php artisan migrate
Once you run this command it will create the users & password reset tables. By default, it also creates a migration table where it’ll store every single migration you make. You should never tinker with this table.
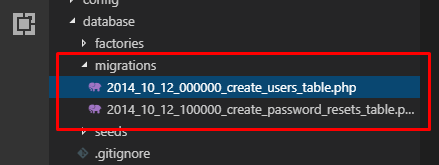
Here are the default migration files that come with Laravel out of the box.
Let’s have a quick look at the migration file and what it’s doing once the migrate command is run in our terminal.
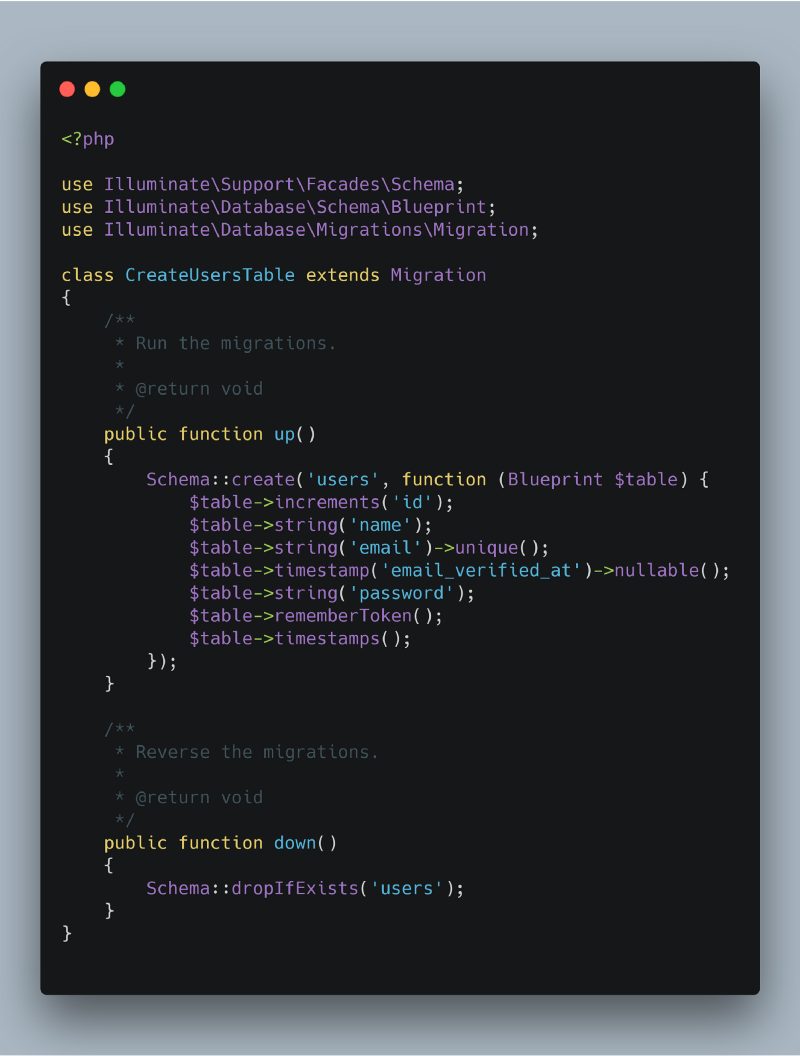
So in the up function, this is where the fields are specified. It’s all pretty straightforward. When we run the migrate the command, the up function is executed and the table is created inside our database. If you’ve run the migrate command successfully, head over to the database that you’ve created, give it a refresh and take a look at the tables that have been created.

As you can see, the columns have been created which reflects the user migration file.
What if we want to delete the table? Can we do this through PHPMyAdmin or Workbench? Yes, we can do that, but if there is a command for it, why not use that? We must get into the habit of using the Artisan commands that are available to us, it will save you loads of time, trust me!
php artisan migrate:reset
The above command will reset the migration for you, there is also the rollback command that rolls back the LAST migration you ran. So that is why it’s important we don’t tinker with the migrations database and the files that are created in the migrations folder. We require these.
There is another command that we can also run, but it’s very important that you only use it in the local environment and not on a live server/project.
php artisan migrate:fresh
The migrate:fresh command will drop all tables from the database and then execute the migrate command.
Creating a migration
To create a migration, we can use the make:migration command. This will create the PHP file inside our migrations folder.
php artisan make:migration create\_tasks\_table
We now have a migration file created, open up that file and let's start adding some fields to it. What I’m going to do is add a title and description field to our database. A task will have a title & a description.
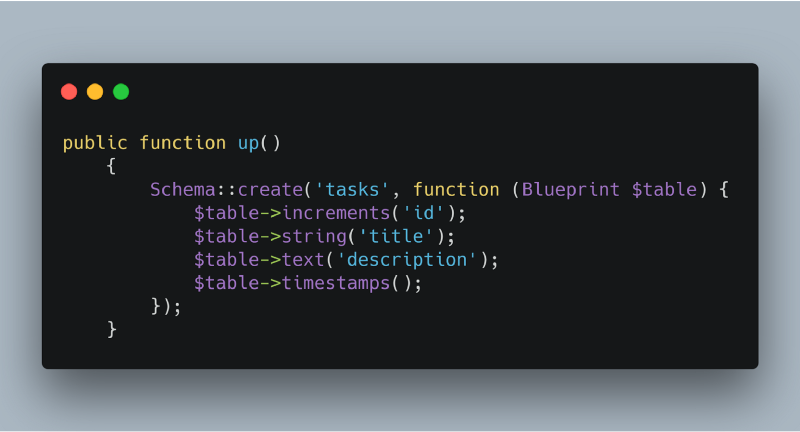
Title and Description have been added to the migration file.
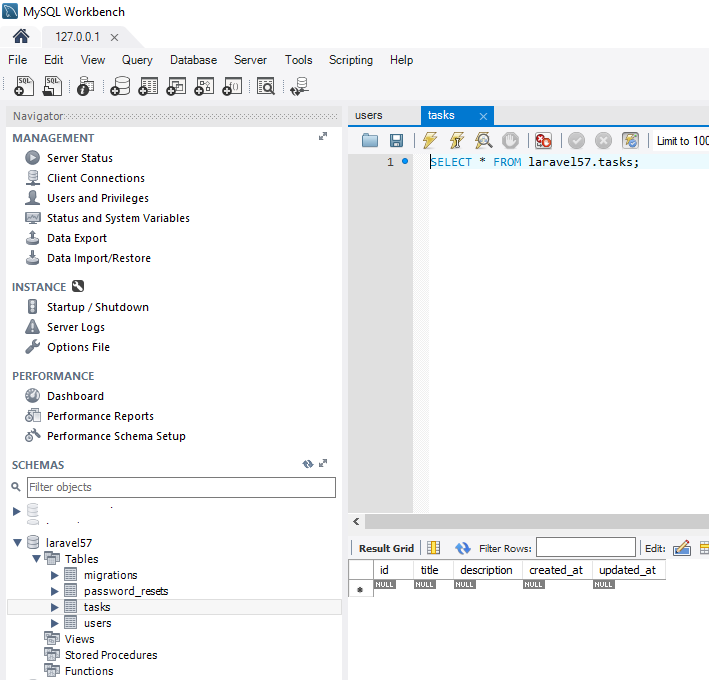
We now have a title and description field when we ran the migrate command.
If you want to make a change to the migration file without deleting the table, we can run the following command;
php artisan migrate:fresh
This will run ALL migrations again. You can find out more information on the Laravel documentation: https://laravel.com/docs/5.7/migrations#running-migrations
In the next article, I will show you how to insert data into the table and how we can query this in our Laravel project.
I hope you’ve enjoyed this article, give it a share. If you have any comments, feel free to use the comments section or get in touch with me on my Twitter. Don’t forget to have a look at my previous articles.