# Laravel 5.7 — Basic Routing
So now you are wondering how do I get into Laravel and build some pages and URLs. Well by the end of this article you will leave knowing what basic routing is and how to get it up and running in your project.
But before diving right into the deep end and drowning, let’s take a look at some of the commands that will be used. In the terminal enter the following command;
```
php artisan
```
Artisan is the built-in command into Laravel, this will give you a list of all the commands that are available to you, don’t worry though, some of the commands will make sense once you start using them. Below is a list of the commands that show up once that command has been executed.
Usage:
command \[options\] \[arguments\]
Options:
-h, — help Display this help message
-q, — quiet Do not output any message
-V, — version Display this application version
— ansi Force ANSI output
— no-ansi Disable ANSI output
-n, — no-interaction Do not ask any interactive question
— env\[=ENV\] The environment the command should run under
-v|vv|vvv, — verbose Increase the verbosity of messages: 1 for normal output, 2 for more verbose output and 3 for debug
Available commands:
clear-compiled Remove the compiled class file
down Put the application into maintenance mode
dump-server Start the dump server to collect dump information.
env Display the current framework environment
help Displays help for a command
inspire Display an inspiring quote
list Lists commands
migrate Run the database migrations
optimize Cache the framework bootstrap files
preset Swap the front-end scaffolding for the application
serve Serve the application on the PHP development server
tinker Interact with your application
up Bring the application out of maintenance mode
**app **
app:name Set the application namespace
auth
auth:clear-resets Flush expired password reset tokens
**cache **
cache:clear Flush the application cache
cache:forget Remove an item from the cache
cache:table Create a migration for the cache database table
config
config:cache Create a cache file for faster configuration loading
config:clear Remove the configuration cache file
**db **
db:seed Seed the database with records
**event **
event:generate Generate the missing events and listeners based on registration
**key **
key:generate Set the application key
**make **
make:auth Scaffold basic login and registration views and routes
make:channel Create a new channel class
make:command Create a new Artisan command
make:controller Create a new controller class
make:event Create a new event class
make:exception Create a new custom exception class
make:factory Create a new model factory
make:job Create a new job class
make:listener Create a new event listener class
make:mail Create a new email class
make:middleware Create a new middleware class
make:migration Create a new migration file
make:model Create a new Eloquent model class
make:notification Create a new notification class
make:observer Create a new observer class
make:policy Create a new policy class
make:provider Create a new service provider class
make:request Create a new form request class
make:resource Create a new resource
make:rule Create a new validation rule
make:seeder Create a new seeder class
make:test Create a new test class
**migrate **
migrate:fresh Drop all tables and re-run all migrations
migrate:install Create the migration repository
migrate:refresh Reset and re-run all migrations
migrate:reset Rollback all database migrations
migrate:rollback Rollback the last database migration
migrate:status Show the status of each migration
**notifications **
notifications:table Create a migration for the notifications table
**optimize**
optimize:clear Remove the cached bootstrap files
**package **
package:discover Rebuild the cached package manifest
**queue **
queue:failed List all of the failed queue jobs
queue:failed-table Create a migration for the failed queue jobs
**database table **
queue:flush Flush all of the failed queue jobs
queue:forget Delete a failed queue job
queue:listen Listen to a given queue
queue:restart Restart queue worker daemons after their current job
queue:retry Retry a failed queue job
queue:table Create a migration for the queue jobs database table
queue:work Start processing jobs on the queue as a daemon
**route **
route:cache Create a route cache file for faster route registration
route:clear Remove the route cache file
route:list List all registered routes
**schedule **
schedule:finish Handle the completion of a scheduled command
schedule:run Run the scheduled commands
**session **
session:table Create a migration for the session database table
storage
storage:link Create a symbolic link from “public/storage” to “storage/app/public”
**vendor **
vendor:publish Publish any publishable assets from vendor packages
**view **
view:cache Compile all of the application’s Blade templates
view:clear Clear all compiled view files
There are quite a few commands but don’t worry at all, you may not end up using all of them.
In the early steps of using Laravel for the first time, you will end up spending most of your time in `routes/web.php`
Let’s take a look at the web.php file in your code editor. With some basic understanding of programming, you should be able to tell quite quickly what the route is doing.
```
Route::get(‘/’, function () {
return view(‘welcome’);
});
```
So Laravel is telling the browser to make a GET request, the *‘/’* is the homepage URL and we then tell the function to return the view *‘welcome’.* Sounds very simple, doesn't it?
Here is some basic information on routing from the official [Laravel website](https://laravel.com/docs/5.7/routing);
> All Laravel routes are defined in your route files, which are located in the `routes` directory. These files are automatically loaded by the framework. The `routes/web.php` file defines routes that are for your web interface. These routes are assigned the `web` middleware group, which provides features like session state and CSRF protection. The routes in `routes/api.php` are stateless and are assigned the `api` middleware group.
> For most applications, you will begin by defining routes in your `routes/web.php` file. The routes defined in `routes/web.php` may be accessed by entering the defined route's URL in your browser. For example, you may access the following route by navigating to `http://your-app.test/user` in your browser
#### EDITING THE WELCOME PAGE
To get to the welcome page, you will need to go to /**resources/views/welcome.blade.php**
This is where you will find the HTML and styling for the page. Let’s update the heading “Laravel” to “Learning Laravel”.
```
Learning Laravel
```
Now refresh the page in the browser to see if that change has been reflected.

The title has now been updated after making the change in the source code
Voila — you have now mastered the first step in locating a view and making a change to it that is reflected in the browser. Give yourself a pat on the back!
#### CREATING YOUR OWN ROUTE
Let’s finish off by creating a route of our own, head over back to **/routes/web.php** copy the current route and set a URL and a view for it to return. Let me show you how to create an about route inside the file.
```
Route::get(‘/about’, function () {
return view(‘about’);
});
```
We are telling the route to get the following URL which is /about and then to return a view called ‘about’. It’s good practice to keep the name of the URL and View the same to avoid any confusion. It wouldn't make sense if you had a URL ‘about’ and the view was called ‘random’.
Try navigating to /about in the browser? Oops! What’s gone on here?
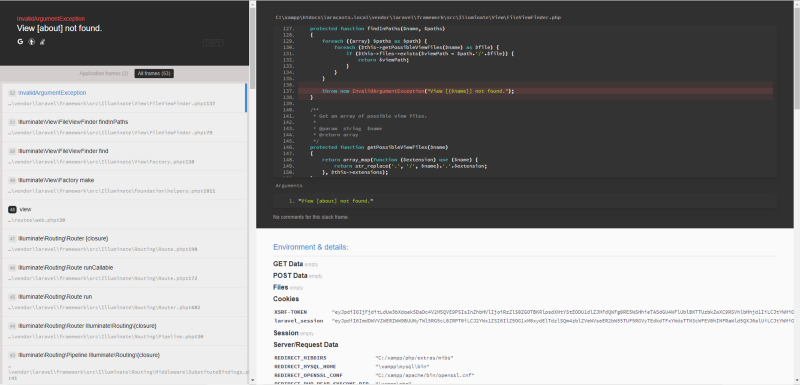
View not found error in Laravel
Laravel is telling us that there is no **view** about created so it cannot, therefore, load it. Go back to your project folder, head over into **/resources/views/** and create a file called **about.blade.php.** You have to include the word blade when creating a view as it’s Laravel templating engine that is being used to render the file.
Once that has been created, add some HTML to the page and then reload the page in the browser, this will get rid of the error message and return the HTML for the about page.
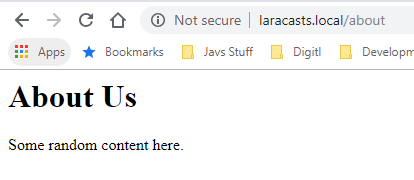
There you go — the about page is now accessible and working!
We now need to set up a navigation of links so we can access the homepage and the about page. Go to the **welcome.blade.php** and insert a hyperlink to the about page.
```
About
```
Reload the homepage and you should now see a link that goes to the About page. We have a problem though, we need to access the homepage in order to get to the new page we’ve created. This is not how navigations are meant to work! We could copy the link and insert it into the about.blade.php file, this isn't the way of doing it, but for now, you can add the hyperlink there to see how linking to each view works.
In the next article, I will show you the correct way of building up a navigation instead of repeating the HTML on every view we create. We will be using layouts.
If you’ve enjoyed this article, give it a clap and share it amongst family & friends. You never know, it may help them in their journey in learning laravel. If you have any comments, feel free to use the comments box or tweet me at @mjcoder on twitter.
Thanks for reading.